

I’ve been editing, mixing and mastering some podcasts recently for a lovely woman called Jess. Jessica Nazarali is an online business expert for coaches and entrepreneurs. The podcasts (It Girl Radio) are based around interviews with influential and successful people in her world. You can find a link to the show on iTunes by clicking the image below:

If you need your podcast editing, don’t hesitate to contact me and we can work out a price around your budget.
The Rest Is For Audio Nerds!
These edits have been a challenge for sure, but I do love a challenge! The main problems arise when I’m editing recordings made over Skype. It’s not even so much the quality of the recording for these Skype interviews seeing as it all gets bounced down to a 96kbps mp3 anyway. It’s the environment the interviewee is in.
Deverberate!
So I’m mainly having trouble with reverb on the interviewee end. I came across a really useful plugin from Avon Digital called DeVerberate.
www.acondigital.com/products/deverberate
This plugin presumably uses some combination of compression and phase inversion (and magic) to cancel out the reverb tail. This makes life so much easier for me.
There are a few other plugins on the market that do the job but I liked the flexibility of this one over say, SPL De-Verb.
Final Plugin Chain
I thought I’d just round off with a few details on how I’ve ended up building up effects on these interviews to make them sound the best they can be.
- Noise – I will run whatever noise reduction necessary first as an audio suite plugin in Pro Tools so then it’s rendered out.
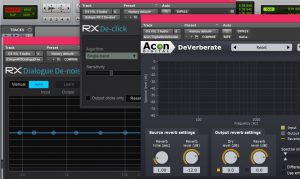
Noise reduction plugins in the Izotope RX range and Acon Digital’s DeVerberate - EQ – Usually just a high pass filter as it’s just speech.
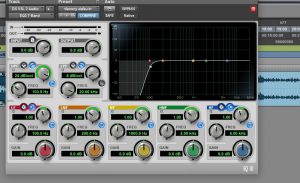
The Pro Tools EQ being utilised as a high pass filter. Useful because of its steep rolloff - Compression – The compression can sometimes seem a bit drastic with the ratio going up to 10dB. This does help to even out the differences in people’s speech and gives that over-processed “radio” sound.
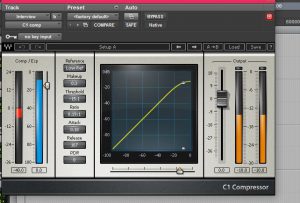
Waves C1 compressor creating that classic “radio” sound as much as possible - Loudness Check – I did a lot of research into loudness units and the best to aim for. I try and stay around the recommended -23LUFS. The Melda Production “MLoudnessAnalyzer” has been a great edition to my toolkit, it’s easy to use and it comes with the free bundle! I will usually put this on the master to keep track of the overall level.

MLoudnessAnalyzer doing it’s job! Notice the average loudness on the graph on the right I hope this has been interesting as I plan on doing some more writing for this blog as I continue on my audio journey online. Let me know if you have any suggestions or projects you want me to work on by contacting me HERE!